
|
I've been writing software for the last eight years. My construction
skills are not even in the toilet. They're at the bottom of my septic
tank, lodged next to differential equations. But, my new old Magnepan
1.6QRs needed an amp, and needed it to be pretty big, and I really
didn't want to pay for it to be pretty big.
A visit to a local hi-fi shop, and many, many stops off on one of the information superwebs schooled me to expect $2000+ of my American dollars for a high-end amp that could produce my target of 300 watts into 4 ohms. That's a lot of dough. I realize I'm supposed to be all high-end happy, but man... that hurts. I kept flopping back and forth between solid state and tubes too, after hearing the VTL ST-150 and (slightly under powered for my use case) McIntosh 275 amps, and the Bryston 4B-SST. I didn't want to like the tube crap, but the damn VTL sounded so good, better than the Bryston, but at half my target power rating. The more I read, the more I became enticed by the promise of the new breed of solid state switching amplifiers. Tubelike? Fast? Effortless power? I have to admit, I was also concerned about the efficiency of tube amps and solid state amps biased into class A. I'm a huge fan of the Nelson Pass designs, but a 20% efficient amp that can drive my Maggies is also going to seriously heat up my room. Ideally, I'd have music going all day. Something like the Aleph 2 that produces 100W class A is gonna sit there and burn more than 300W all the time. And, I'd need two of them! Is my habit really worth this kind of electric bill, not to mention the environmental cost? I actually tried to design my own 20W class A amp back in like 1996, the FU2000, but I only ended up with a decent power supply, and an okay gain stage. I never got the power section working. This would have burned about 100W all the time, producing enough power to drive my little RA Labs bookshelf speakers. But, I was prepared to deal with it... Article after article I read on the switching modules from Bang and Olufsen and from Hypex (by way of Philips) raved about what was happening. There aren't any kits based on the B&O modules, but the Hypex ones have a huge following. (Sander Sassen has a good write up of the Hypex products at hardwareanalysis.com). Hypex bought the technology from Philips, and hired its mastermind Bruno Putzeys away. He's all over the diyaudio.com forums, helping people tweak stuff. And, these designs are like 90% efficient! I was intrigued by the idea of jumping on the current DIY audio bandwagon, and having some measure of guaranteed success at it, experiencing some great sound, while not wrecking the environment completely. I keep promising to finish the old class A amp, but in a decade, it just hasn't happened. This kit stuff though... I should be able to get that to work! I got my kit from diycable.com in time for my long-overdue do-nothing-except-fun-crap vacation. I had a brief interaction with the dude there about supply issues on the... supply. He proposed a deal with two mono supplies instead of a stereo supply, and I took it with great gusto. Here's my final bill of materials from diycable.com:
As you can see, there's no enclosure, and I'm missing a bunch of stuff that those of you who are actually good at this might realize I would need. Maybe a view into my workspace would give some clue into my state of mind?
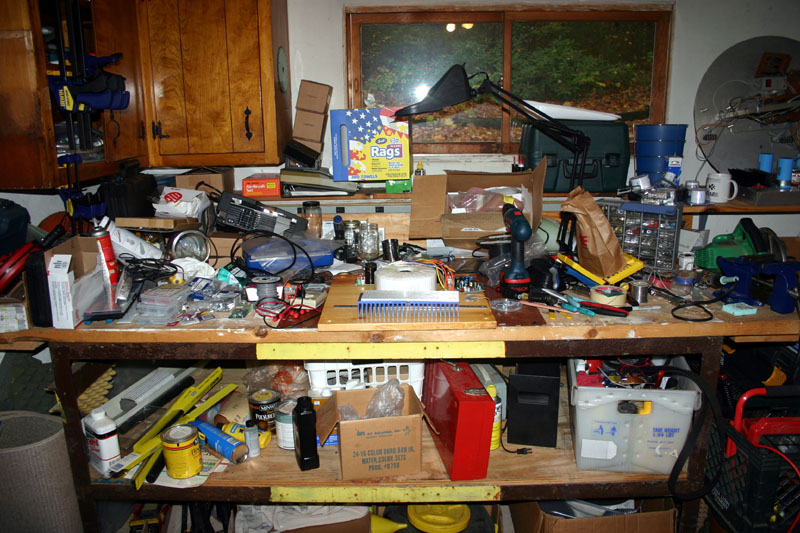 This is either my workbench or my brain. You can actually see my old class A amp carcass at the top right of the photo. It's the thing with the sky blue 63,000uF Mallory caps, next to the coffee mug. The aluminum circle behind it is my totally sweet High School Science Fair robot. There's a store called You-Do-It Electronics out here in the Massachusettsland, but it's really called "You-Blew-It", because you've screwed up if you had to go there. Including the crap I picked up there, and the crap that was lying around in my mess, the remainder of the BOM looks like:
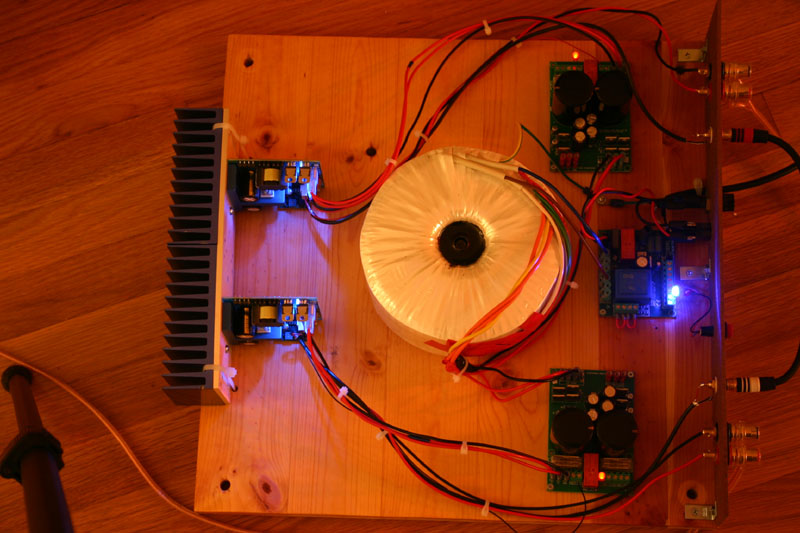
Part 1: The PrototypeSince I can't remember if I have a clue about anything electronic, I decided to hack together a prototype. This give me the chance to mess it up once, and to see how the components laid out, before I commit to putting this thing in a fancier chassis. That's why there's a weird square piece of 3/4 inch pine in the BOM above.I looked around for another source for the power transformer, but in the end, I went with diycable.com's solution. The price was right, it was rated for 1kVA, and the output voltages were what you'd want. I'll tell you though, the thing weighs 22lbs! It is serious about being a transformer. There is no way that you're putting this in the rear of a case, or anything. It has to go right in the center. And, so it went right in the center of my sweet piece of pine:
Transformer mounted on board. This photo clearly reveals the transformer's aura as golden angelic rays. I bet it's going to sound warm! Due to the wood's thickness, the supplied bolt doesn't quite go all the way through. This is even after routing out the hole a little bit more, so the bolt head was recessed into the pine. I can't imagine that even with 1/4 inch aluminum that you'd really be able to put the washers in there and still have enough meat for the nut to grab. I screwed the power supplies and soft start module directly to the board with #4 wood screws. Yes, it felt wrong. I decided to place the soft start module in the center.
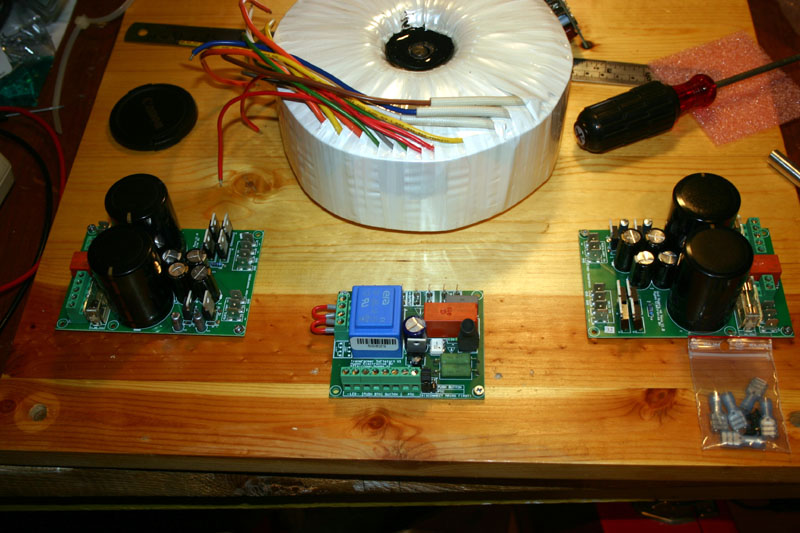 Power supplies and soft start mounted, with the grain, for improved danceability. Mounting the amp modules did not go entirely as advertised. There were included #4-40 screws to mount the UcD400s to the adapter plate made by diycable.com, which was cool. (I decided to use only one for now, with both heat sinks on it.) But, there was no sight of the #8-32 screws to mount the heat sinks to the adapter. No problem, I LOVE to go SHOPPING! I have no idea how the holes in the heat sinks were tapped, but it sure wasn't for #8-32. They are now though! I didn't use any thermal grease on these. After running the amp for an hour or so, they're warm, but certainly not hot. This little guy is pretty efficient! I think that I'll probably use some in the final mounting, but I don't know if it really needs it. The assembly instructions for diycable.com's Exodus amplifier (based on this platform) don't mention any.
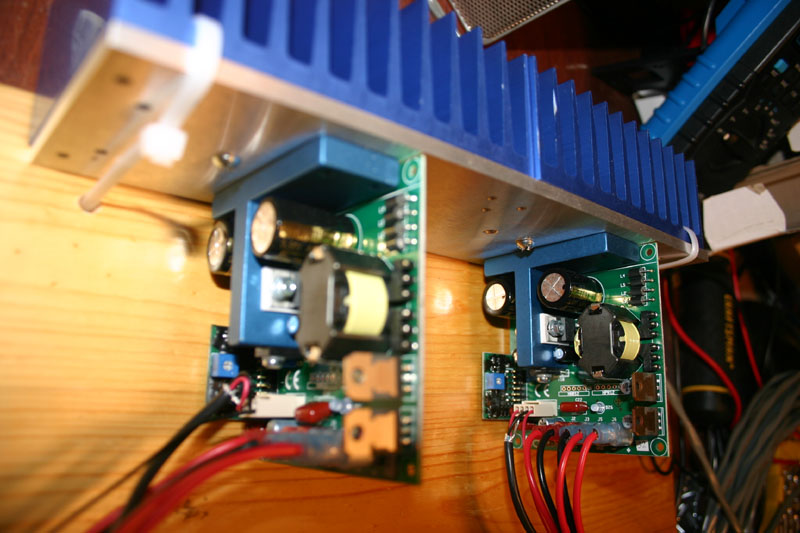
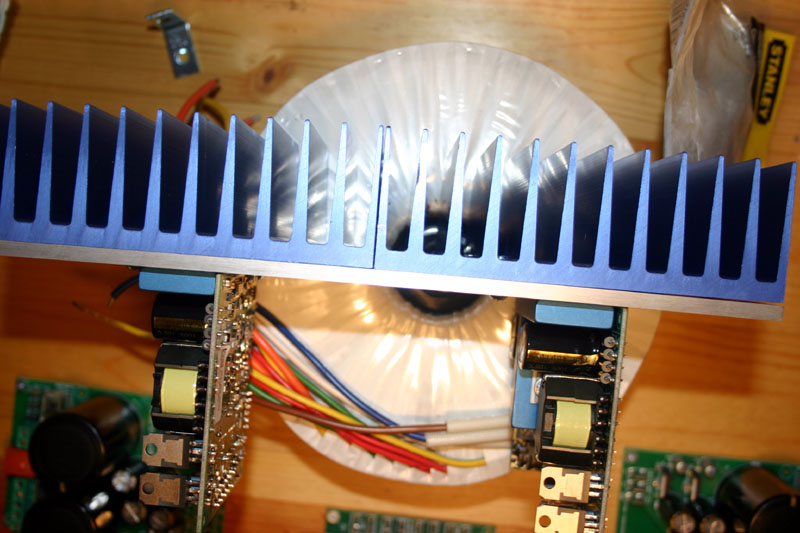 UcD400 modules mounted to the adapter bracket, and to the heat sink. I really like the blue. The diycable dudes did a good job packaging everything. The amp modules came with little baggies with the screws and an appropriate number of (insulated!) faston connectors. All the electronics were in anti-static bags, with anti-static foam on the underside. Nice!
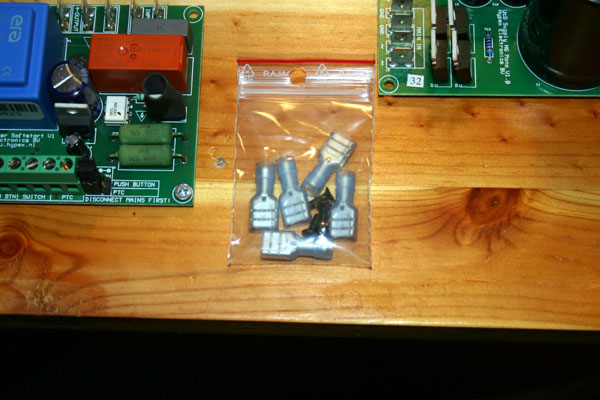 Here's a close-up of the soft start module and associated AC mains wiring. After using this, I don't think I'd skip it. Certainly, you could roll your own for way cheaper, but this one works, and is easy to work with. Yours would probably be all hacky.
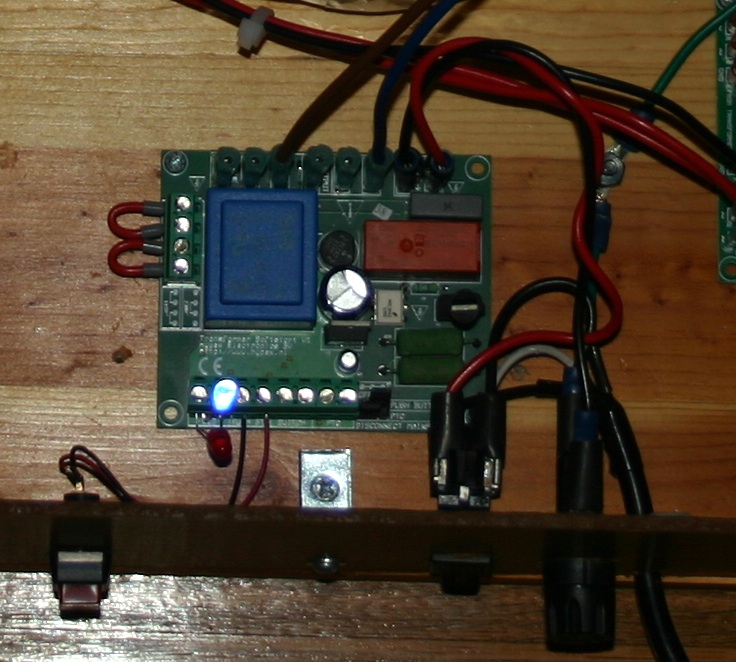 Soft start module and associated kwality wiring. As you can see, I put the extra fastons on the unused, exposed connectors. There's quite a few of them. I wired the DPDT to switch both hot and neutral. The fuse is after the switch, on the neutral side. You can see the ring terminals I mounted to the wood - this is the chassis ground. Yes, I know... weak. I only grounded the ground from the AC mains to the foil on the toroid. I was fully expecting to have to do something for ground even for the prototype, but I really didn't. There's no detectable hum... it's quiet! I ended up using diycable's documentation on their exodus amp kits to figure out how the transformer was wired. The label on the toroid used punctuation in new, clever ways, saving the ink they would have spent on a meaningful word or two by folding it into a comma, or a dash. For 125VAC, it's the brown and blue wires. The yellow/green is the foil that's wired to ground. Then the two 40VAC outputs are on the orange lines, with the yellow neutral. One cool feature of the soft start circuit is the momentary (push button) contact for startup. It holds the amp down in standby mode, until I push the sweet Radio Shack "soft feel" momentary switch on the left there. I'll eventually replace this with some kind of remote control output. There actually appears to be two levels of power sequencing in this arrangement. The relay on the soft start circuit does its job for the inrush AC for the toroid, and then each power supply has an "on" line that it uses to tell the amp module that everything's cool. Here's a close-up of one of the power supplies.
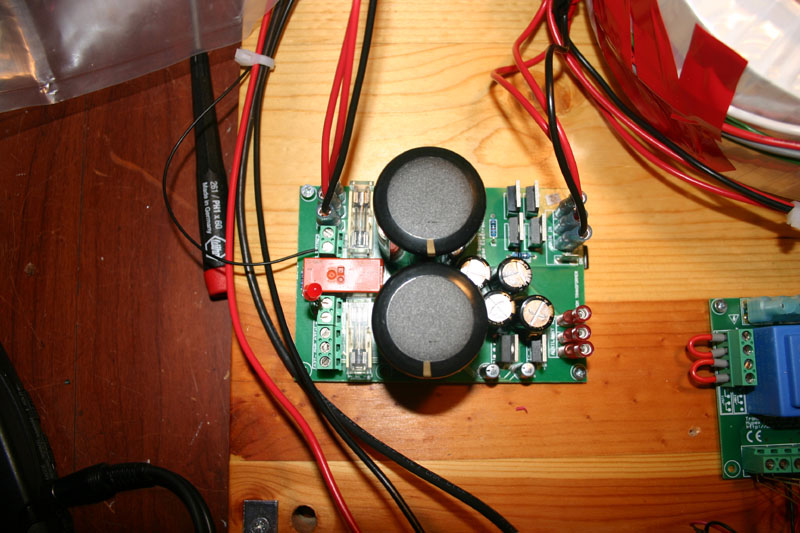 One of the mono supplies. You can see the 22AWG "on" line connected to the screw terminal to the left of the above photo. The 40VAC transformer outputs are connected on the right, and the +61VDC/-61VDC outs are on the left. Each rail is independently fused.
 Totally freaking correctly wired signal cable. Probably the most annoying part of this for me was the damn 4 pin header connector. When I saw that it'd cost me 22 bucks to buy two of these from diycable.com, I balked. I can build these myself! I like making cables! If you haven't done it before (it had been a while for me), these suck to make. The little pins are super tiny. But, I thought I had it easy, because the Hypex documentation clearly labeled pin 1... and my connectors had a huge "1" on them. Maybe there's some kind of language barrier? It could be that in Netherlandese, "1" is actually pronounced "4"? Or maybe it's some kind of weird connector Coriolis effect? Well, after discovering that the amp module actually turned on whenever I connected my line level source (whoops!) I finally managed got it right. This is how it goes: the "on" signal is the lone red wire at the bottom. It's going to go to the pin on the header on the amp module closest to the blue LED on the board. From there, it's inverting input, ground, non-inverting input. These amp modules actually have balanced inputs, which would be totally rad if I had a balanced output somewhere. I just wired the inverting input to ground. Maybe you should just pay the 22 bucks?
 Amp modules connectorated. Sorry about the focus on this one. Hey, you see those parts at the top of the modules, which are probably voltage regulators? Yeah, they gave my finger a little tingly action. I actually measured a 120 volt potential across their exposed shiny behinds. Your finger will probably find out too. Recommendation: DO NOT LICK. It's done! Check it out on my bench:
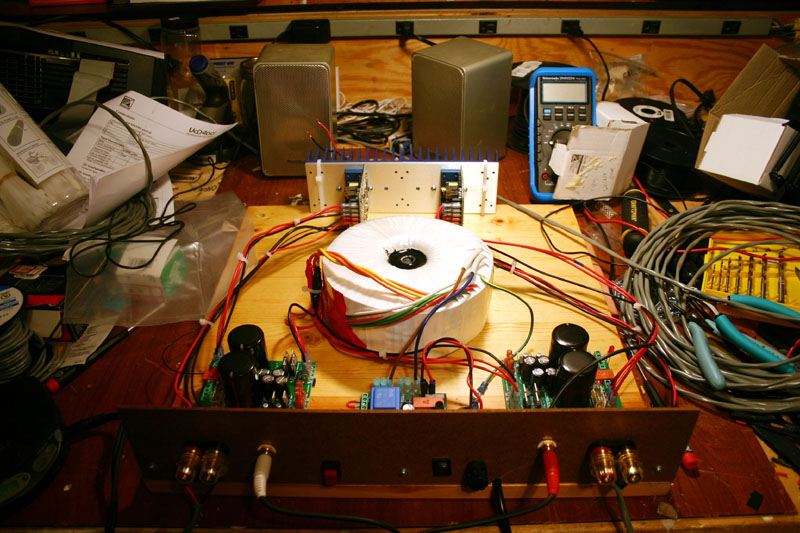 An amp only its mother could love. There's a few important points to make here. First, yes, those are Radio Shack's finest Minimus 7 loudspeakers. One of them has a blown tweeter. I figured that they didn't owe me anything anymore, and I was kind of ashamed to own them, so if I scrod up the amp somehow, maybe I could totally destroy them. Second, kudos to prefect for letting me borrow his sweet Tek multimeter. Again, Radio Shack let me down when the Micronta multimeter I've had for like 20 years finally kicked it dead school. Jesus, I really need to not shop at Radio Shack anymore. That'll be my mid-October resolution, okay? Also, check out the CD player:
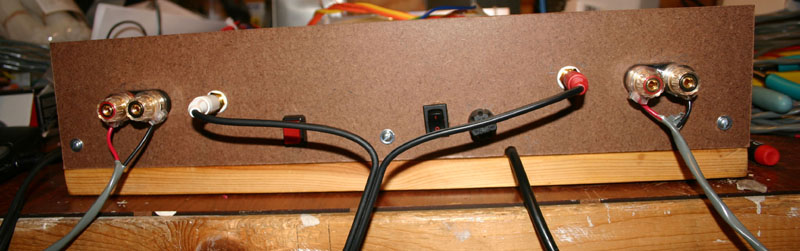
 Panasonic MASH CD player, circa 1994. And, look what's been inside it for like the last decade! I had this old portable CD player stowed away in a box o crap. I occasionally use it for audio testing, but by occasionally, I mean I can't remember using it in the last decade. It still had the Living Colour CD in it. That really has to date it. For those of you kids that think that CD players are all the same, I invite you to take a trip back in time. They're so way not the same. This player sounds OK, but it definitely has a sound to it. When people were all complaining about digital "hash" back in the late 80's and early 90's, this is what they meant. And, the MASH crap in this one does all the right noise shaping too. Here's a shot of my uber hot masonite rear panel. I don't know why I put the line inputs that far apart. It seemed cool at the time. No, the rocker switch is not plum. I still really like the binding posts from diycable. I could take or leave the RCA's. They're fine.
 NASA should hire me. The left channel worked first try! The right channel though... it didn't work. I was starting to freak out after triple-checking all the connectors and scrutinizing the back of the amp module, when I realized I missed the obvious. The frigging speaker had come unplugged! The frigging spring-loaded terminals on the back had let go of the frigging crappy speaker cable. Reconnected... good!
 Upstairs, all hooched up. I brought it upstairs. I had a woefully underpowered 60W into 4 ohm Pioneer A20 integrated amp driving the maggies just so we could have some music upstairs. I briefly listened to some of Kind of Blue, just to refresh my sonic memory. I said "that was craptastic", as I disconnected it. I Hookered the new baby up to my Maggies. For an input, I had hacked up an old integrated amp to just use its reasonably good stereo pot. It was driven by the line-level out of my squeezebox. Instantly, the sound was huge, clear and open. I don't know that I'd call it tubelike, unless by tubelike, you mean that it sounds like something you'd want to hear. I don't have a lot to compare it against, but I think it sounds great. It is able to push these speakers as hard as they need. I would put it up there with the VTL amp I heard, but that was three weeks ago or so. Now, I'm just enjoying listening to everything again!
Mike Andrews
 Ahh... the blue glow of hi-fi! Now, I need a real case! |
| Information updated on Saturday, 27 October 2007. |
| rocko@gweep.net |